

In this time, I will show you how to create and configure an iSCSI target server on Windows Server 2016. Internet Small Computer System Interface (iSCSI) is a way of connecting storage devices over a network using TCP/IP. It can be used over a local area network (LAN), a wide area network (WAN), or the Internet. iSCSI devices are disks, tapes, CDs, and other storage devices on another networked computer that you can connect to.
Install iSCSI Role on Windows Server 2016
Using Server Manager (GUI)
iSCSI Target can be enabled using Add roles and features in the Server Manager:
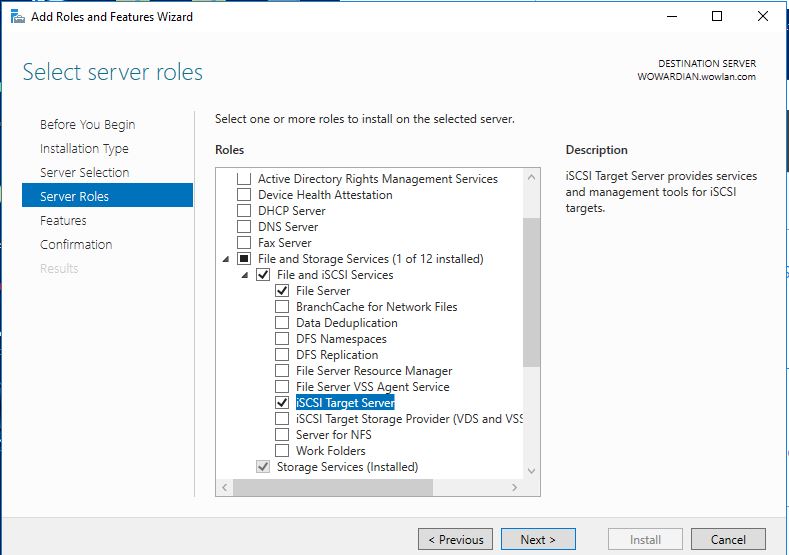
- Choose the Role-based or feature-based installation option.
- Select the server you want to enable iSCSI Target.
- Select the iSCSI Target Role. Select “File Server” Role and “iSCSI Target Server” role.
- Confirm the installation.
Using PowerShell
Open the PowerShell cmdlet window, and run the following cmdlet:
Install-WindowsFeature -Name FS-Fileserver, FS-iSCSITarget-Server
Configure iSCSI Target Server on Windows Server 2016
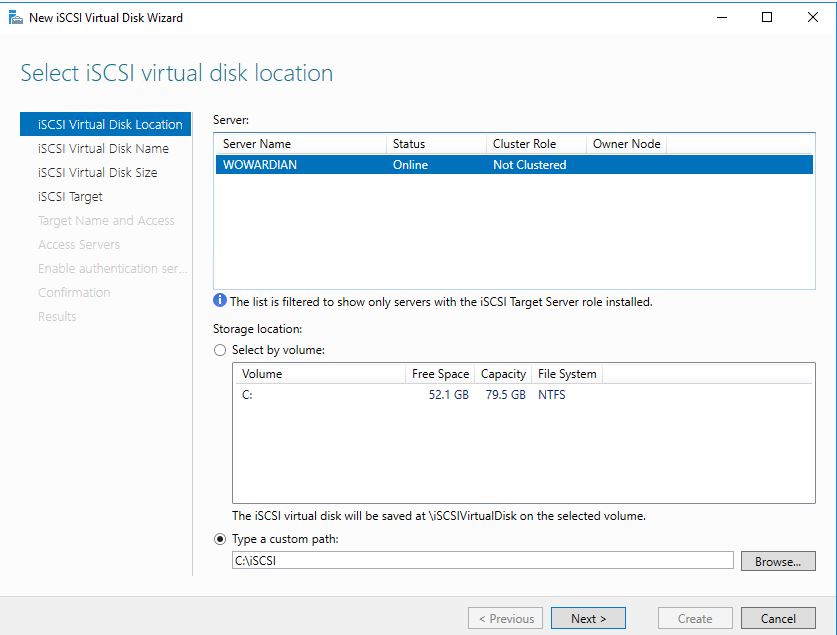
Create iSCSI LUN
To share storage, the first thing is to create an iSCSI LUN (aka. iSCSI virtual disk).
Using Server Manager (GUI)
On the Server Manager, select “File and Storage Services” on the left panel and click “iSCSI” menu. On the main panel, you click the link “To create an iSCSI virtual disk, start the new iSCSI virtual Disk Wizard”

Select the virtual disk location.
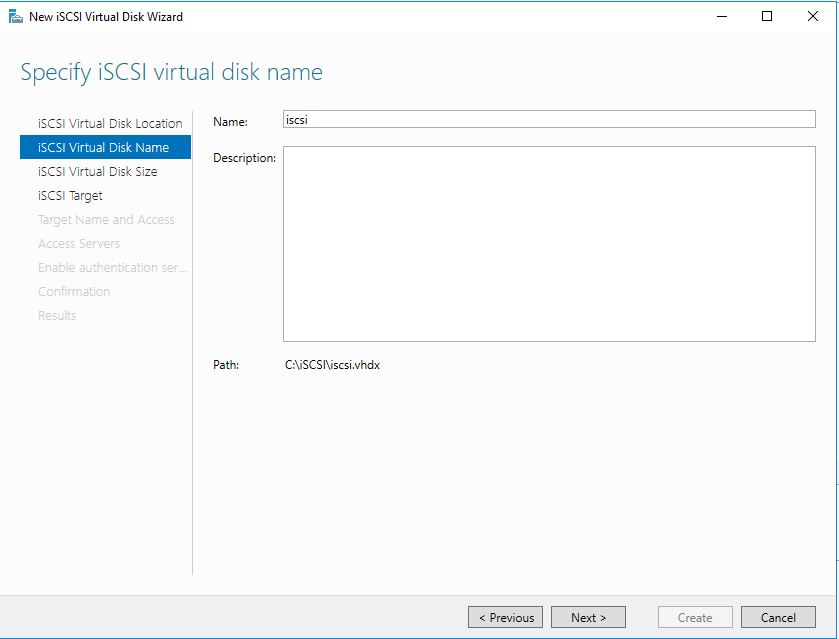
Specify the Virtual Disks Name.
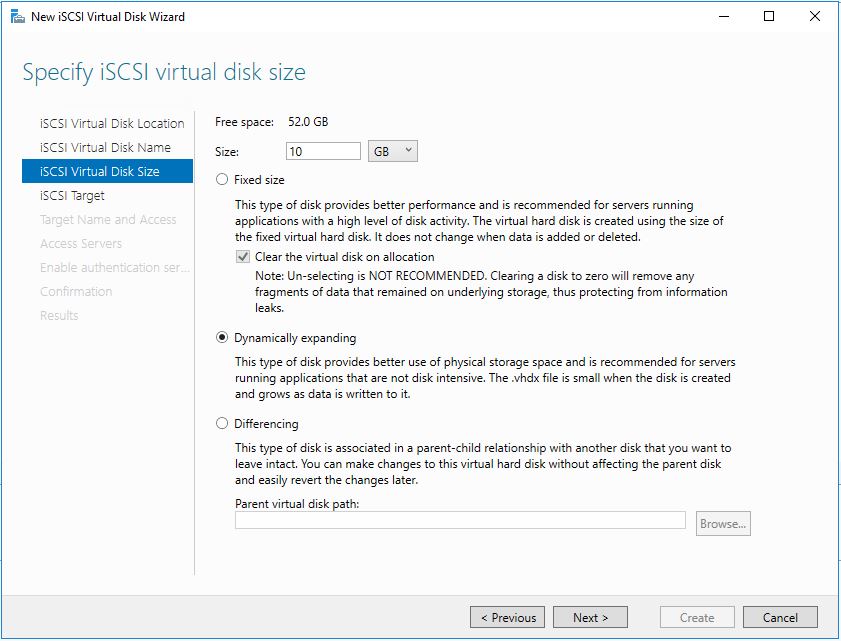
Specify the iSCSI virtual disk size.
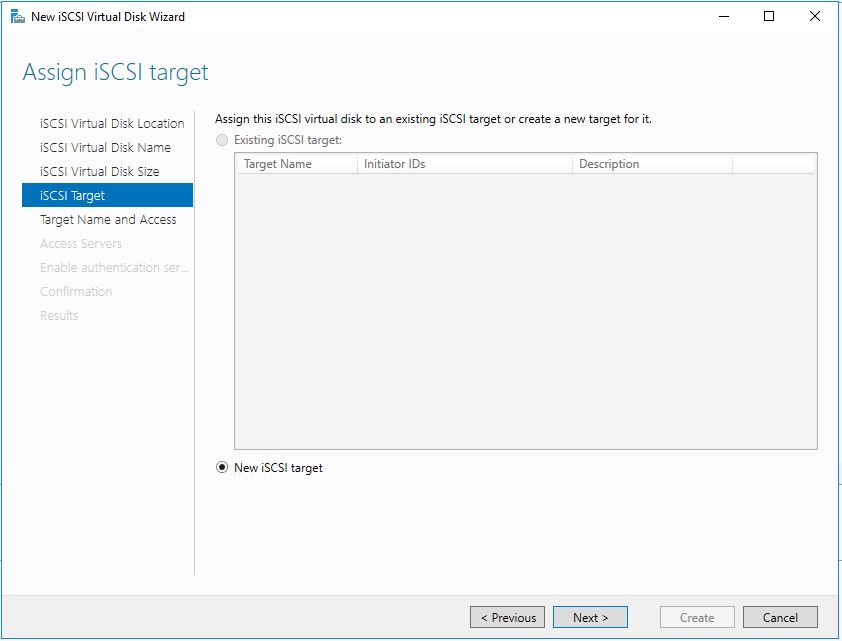
Now, you will need to create or use the existing iSCSI target. To create a new iSCSI target, select “New iSCSI Target” option.
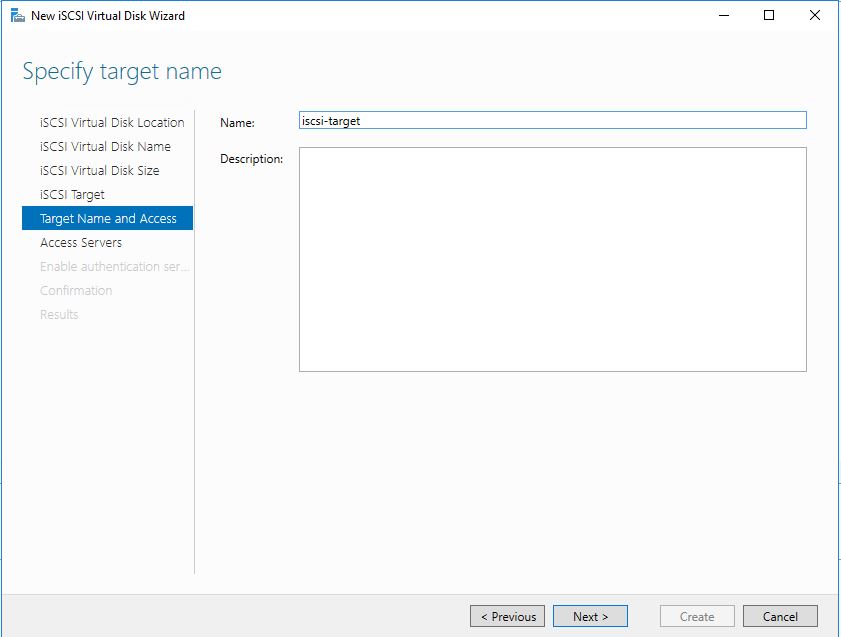
Give the Target a name. This name will be discovered by the iSCSI initiator, and use for the connection.
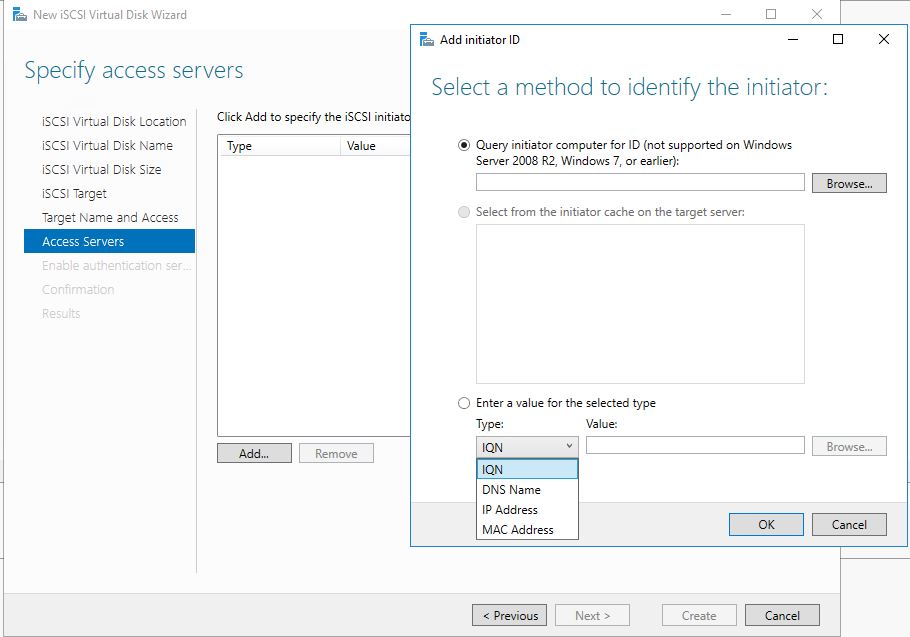
This page allows you to specify the initiators which can access the virtual disk, by allowing the Target to be discovered by defined list of initiators. You can use IQN, DNS Name, or IP Address.
CHAP is an authentication mechanism defined by the iSCSI standard to secure access to the target. It allows the initiator to authenticate to the Target, and in reverse allowing the Target to authenticate against the initiator.
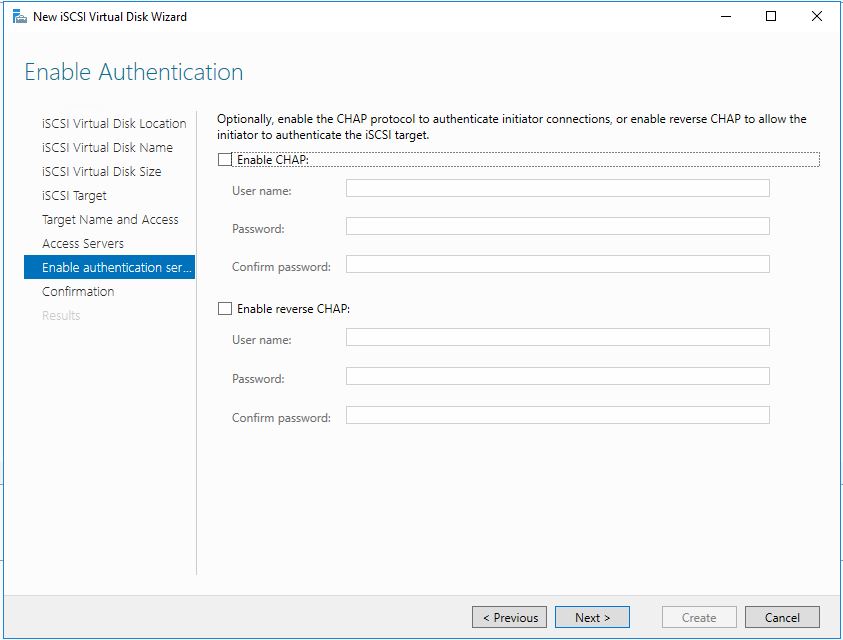
Note: You cannot retrieve the CHAP information once it is set. If you lose the CHAP information, it will need to be set again.
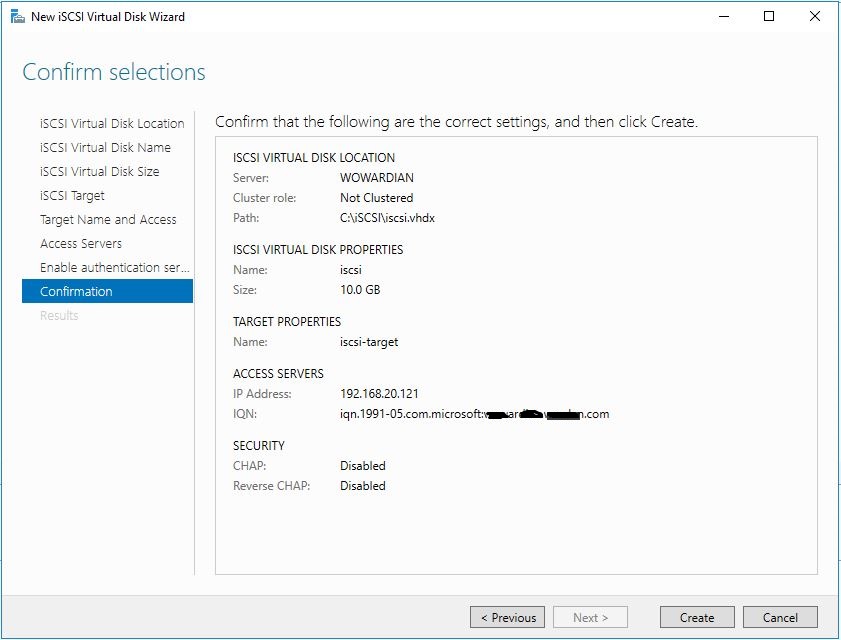
Confirm the setup.
Using PowerShell
Create LUN
New-IscsiVirtualDisk -Path "C:\iSCSI\iscsi.vhdx" -Size 10GB.
Create iSCSI Target
New-IscsiServerTarget –TargetName iSCSI-target –InitiatorIds “IQN:iqn.1991-05.com.Microsoft:VM1.contoso.com”
Assign the VHDX to the iSCSI Target
Add-IscsiVirtualDiskTargetMapping -TargetName iSCSI-target –Path "C:\iSCSI\iscsi.vhdx"
And the iSCSI Target server is ready to use. You can set the iSCSI Initator and connect to the iSCSI Target Server